Build flows and diagrams with flows and connectors
Use lines to create paths between sticky notes, text objects, or shapes. They’ll help you organize your whiteboard and create a flow of thought.
You can customize the color, endpoints, and stroke weight of all your lines.
In whiteboards, we have:
Straight lines: A direct path between elements on your whiteboard. Straight lines will always remain straight, regardless of how they’re resized or moved around.
Dynamic lines: A path between elements on your whiteboard that dynamically changes shape as you resize it and move the components attached to it around.
Create a line
There are multiple ways to create a line.
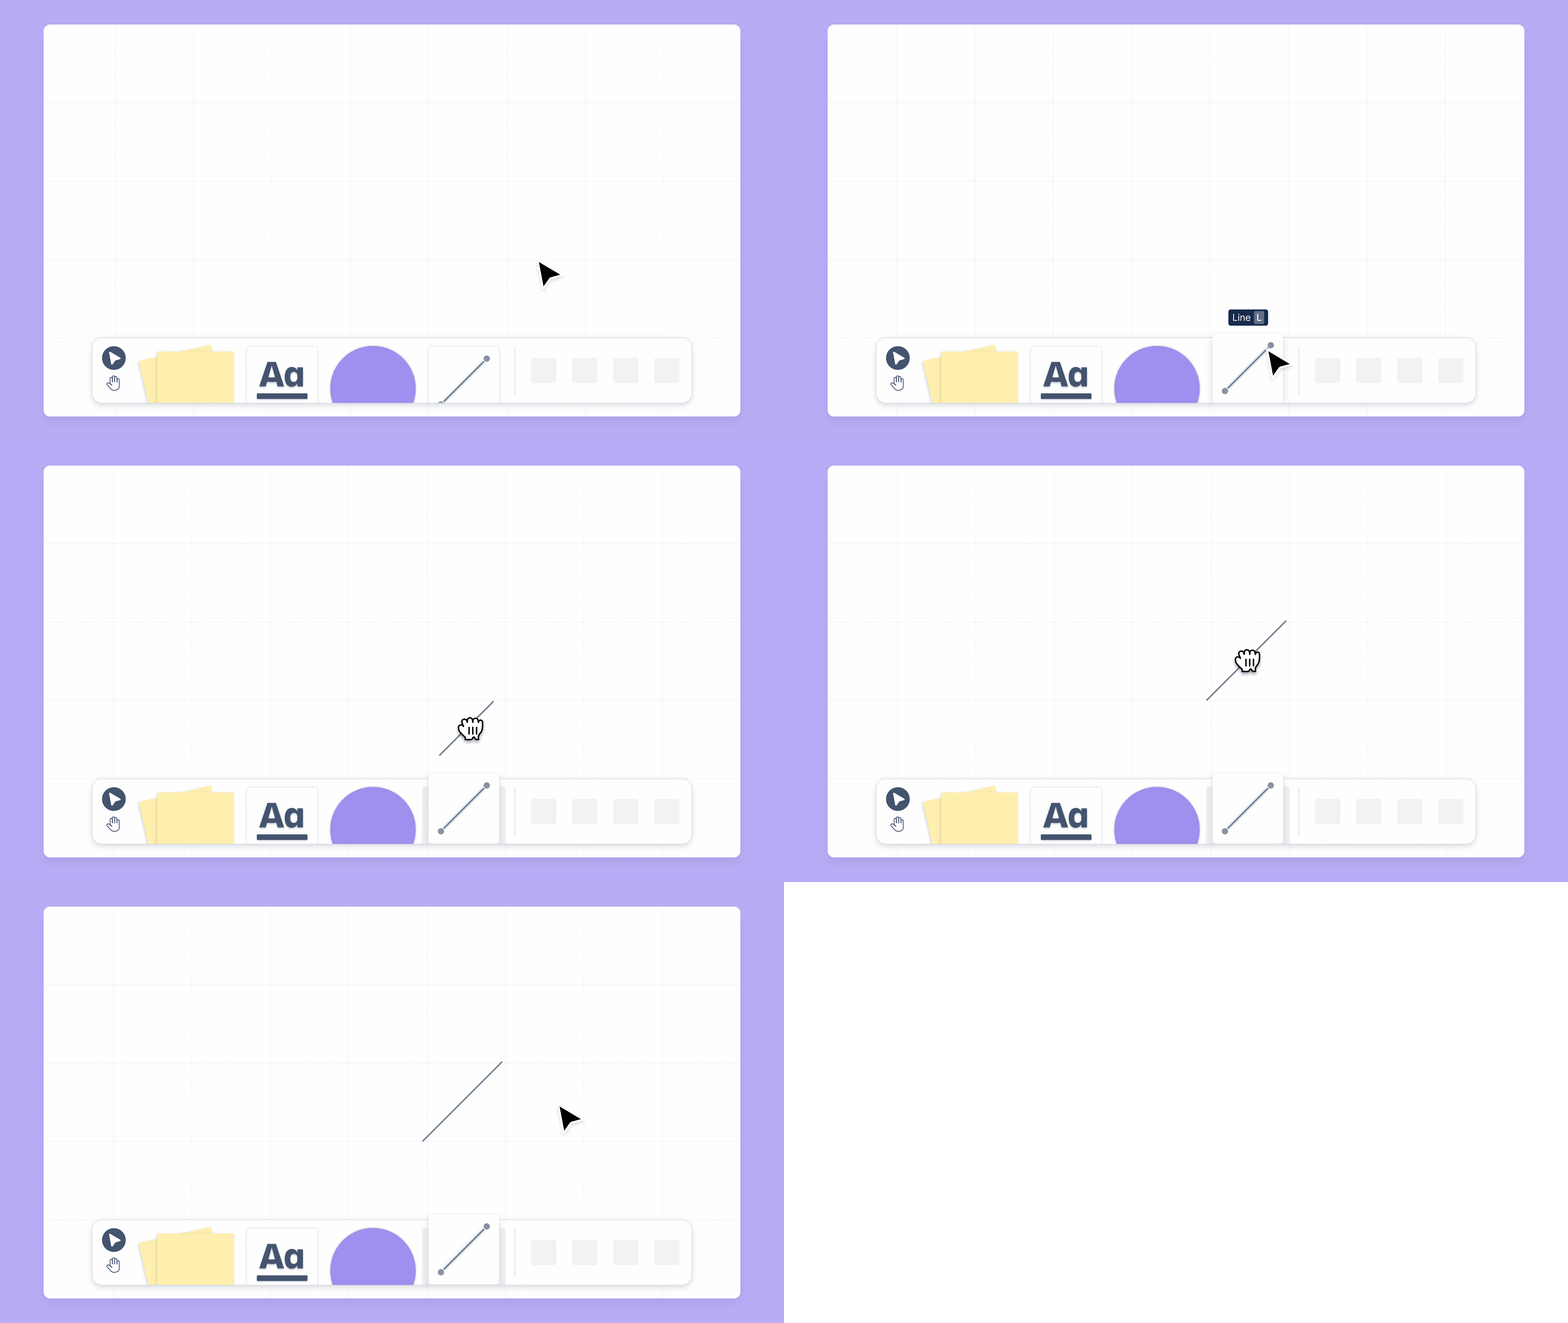
Create a line by dragging it from the toolbar
Select the line icon in the toolbar.
Choose between either the straight or dynamic line icon (we’ll select the straight line by default).
Select and drag the line icon in the toolbar to drag and drop a line onto your whiteboard.
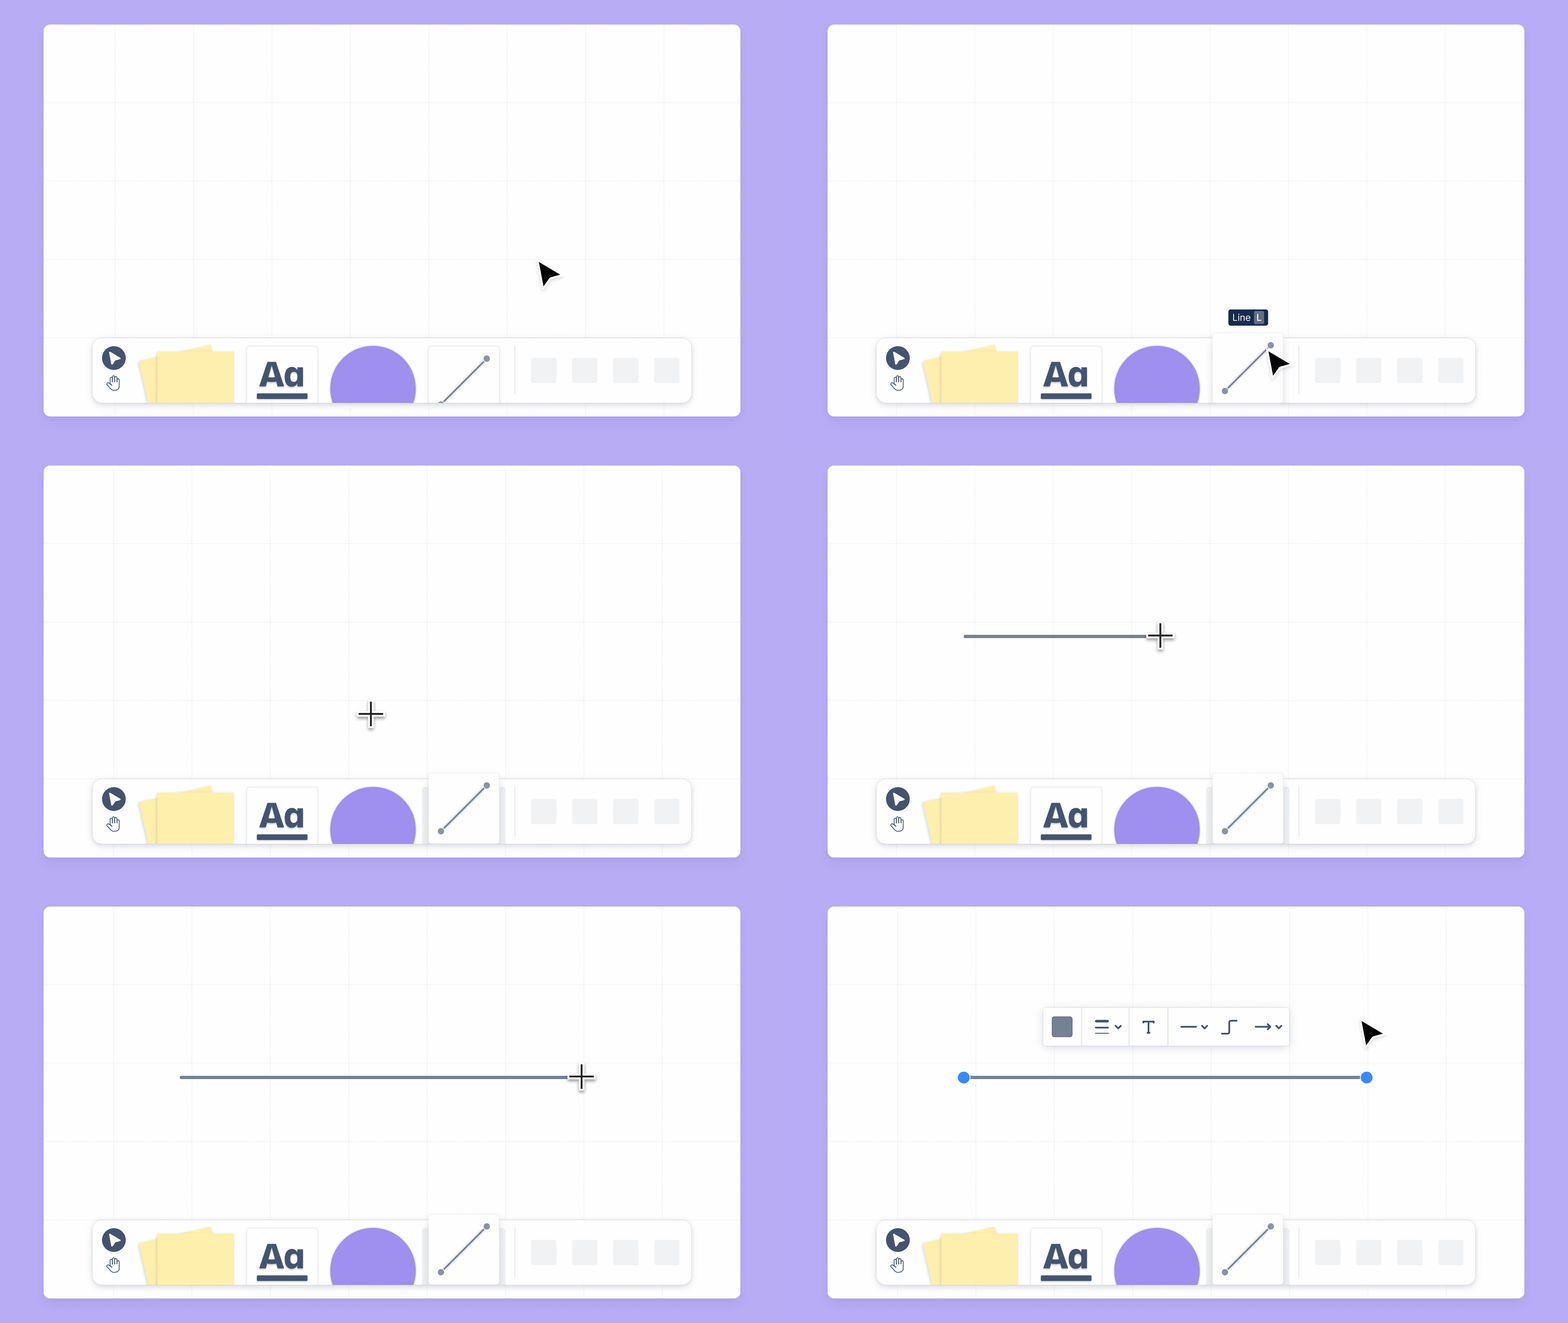
Create a line by drawing it on your whiteboard
Select the line icon in the toolbar.
Select either the straight or dynamic line icon (we’ll select the straight line by default).
Using your cursor, choose and select where you want to start drawing your line on your whiteboard.
Drag the cursor to draw the start of your line.
Select again to finish drawing the line.
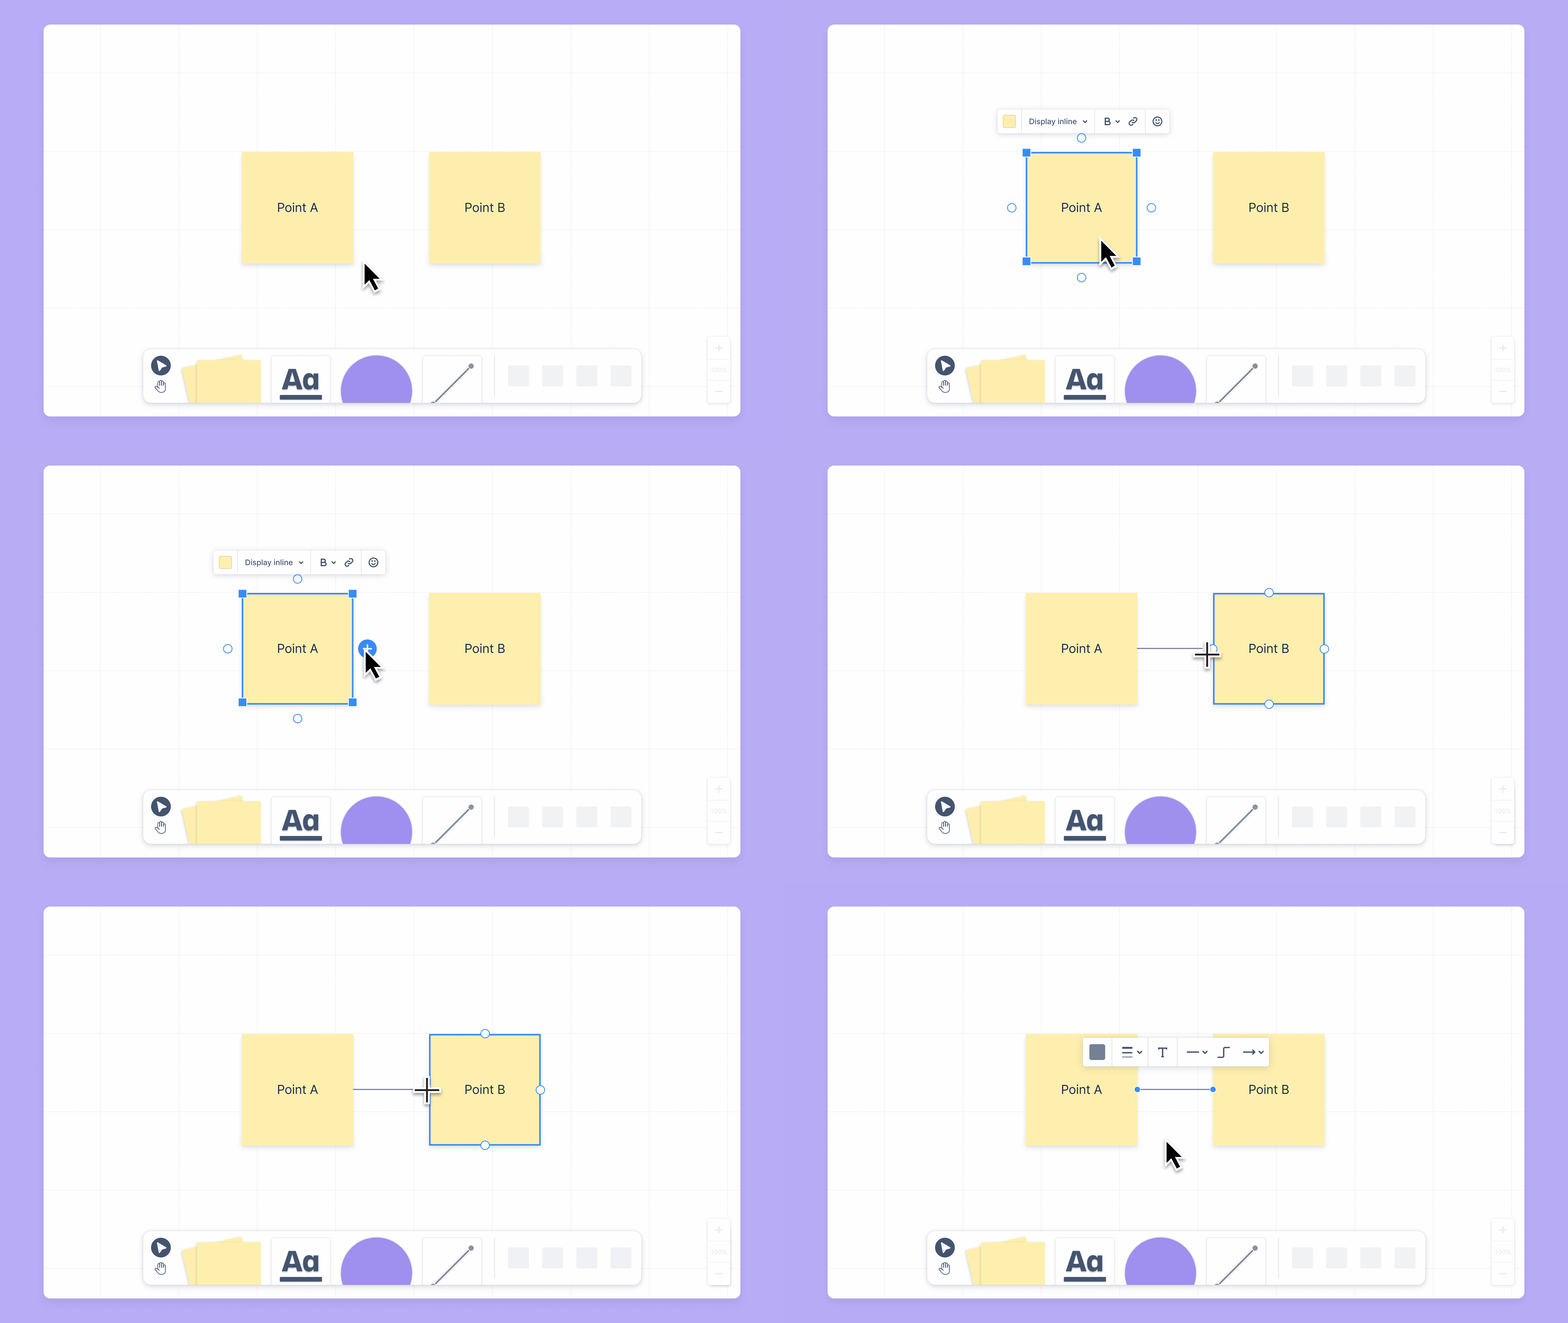
Create a line by using the anchor points on an element
Select any element on your whiteboard (for example, shapes).
Hover over one of the anchor points that appear on each of the element’s sides.
Select your chosen anchor point.
Hold and drag your cursor to start drawing a line and release it to finish drawing the line.
You can place the end of your line in a free space on your whiteboard. Alternatively, you can hover over an anchor point on another element to connect the end of your line to that element.
Move lines
Lines can be moved around your whiteboard and connected to other elements. Move them to illustrate a flow better or make space for other elements and ideas.
Move the start and end points of a line
If your line is connected to an element on the whiteboard, you can move a line's start or end point to a new place.
To move the start or end point of a line:
Select and hold the end of the line you want to move.
Draw it to either free space on your whiteboard or a different anchor point on the same or different elements.
Release your mouse to place the endpoint of the line.
Move an entire line
Like any other element, a line can be moved around your whiteboard.
To move an entire line around your whiteboard:
Select the line.
Move it to your chosen area on the whiteboard.
Select where you want to place the line to drop it on the whiteboard.
Note: If your line is connected to an element, the element will be moved with the line.
Edit lines
Lines can be edited to change their appearance. Edit a line to change the color, thickness, styling, or type.
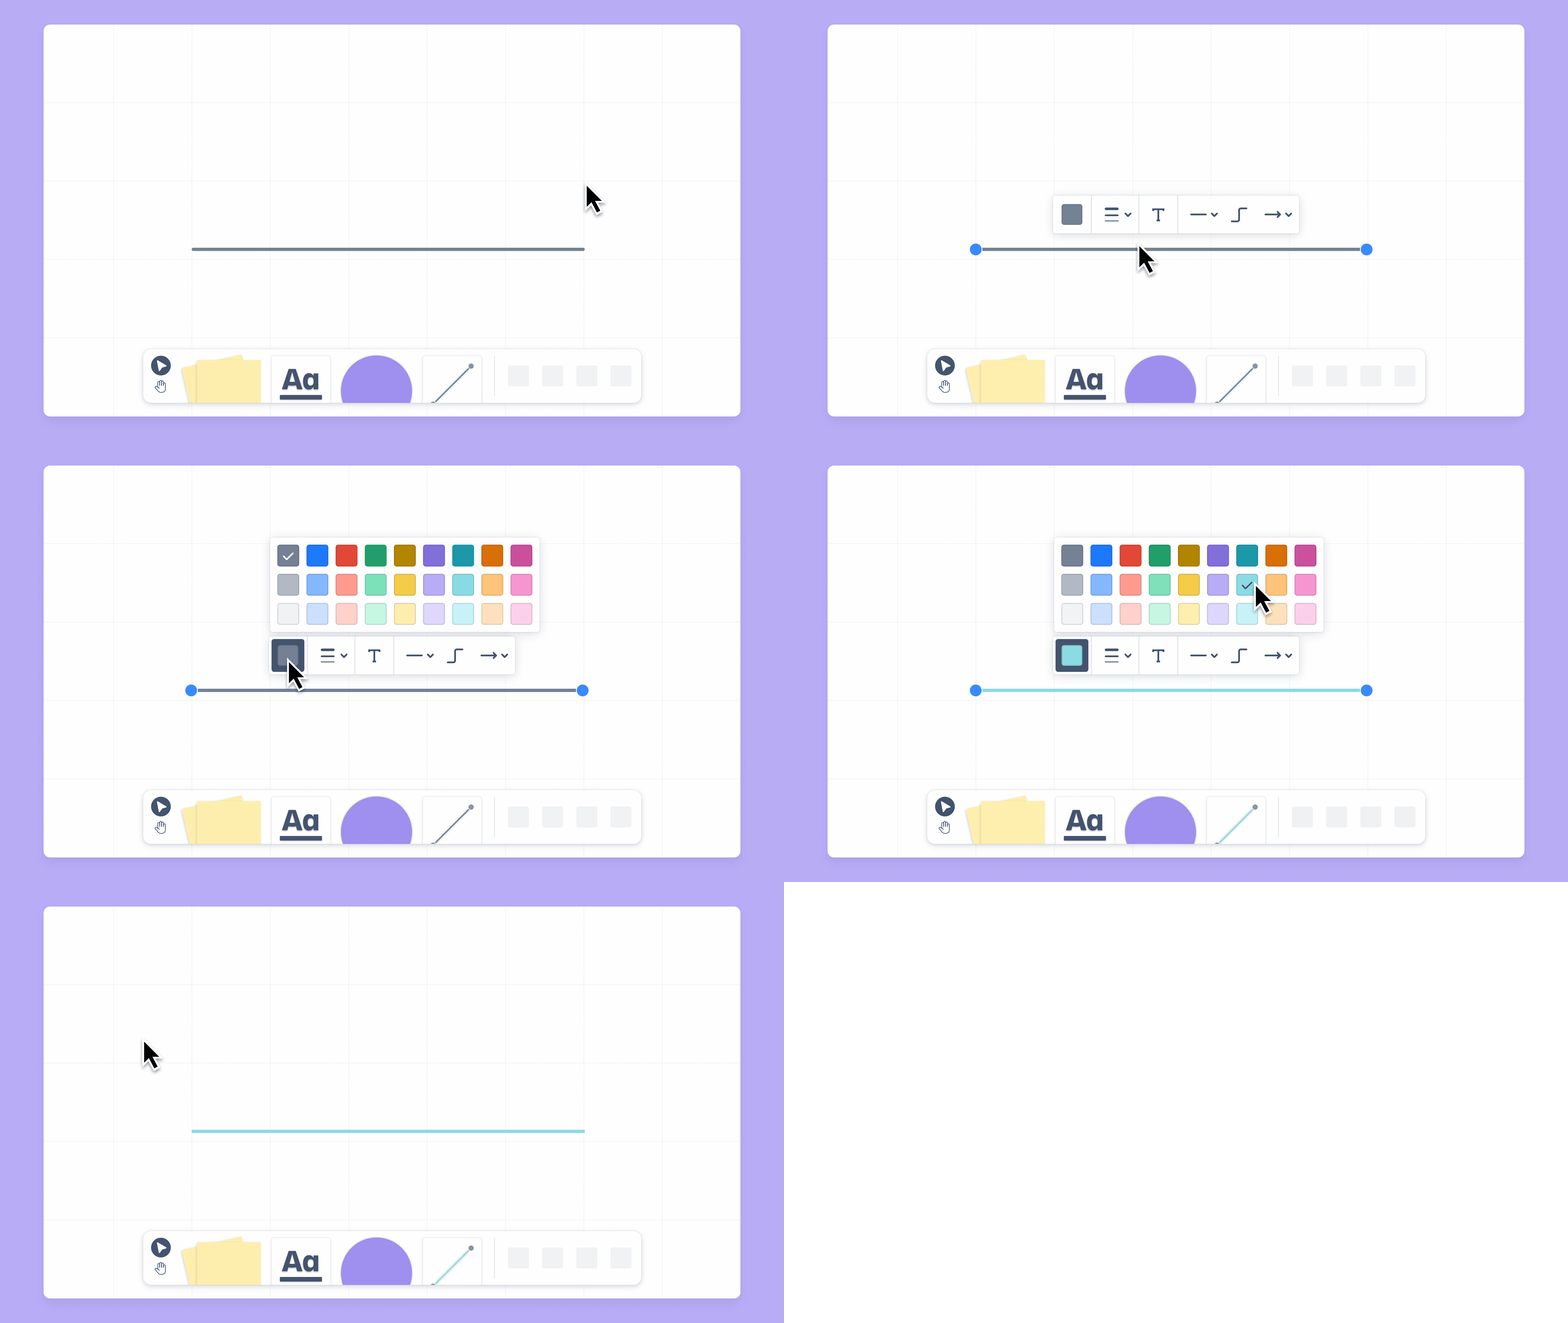
Edit line color
To change the color of a line:
Select the line.
Open the color picker from the floating toolbar.
Select a new color.
Edit line thickness
To change the line thickness:
Select the line.
Open the line thickness menu in the floating toolbar.
Select a new thickness.
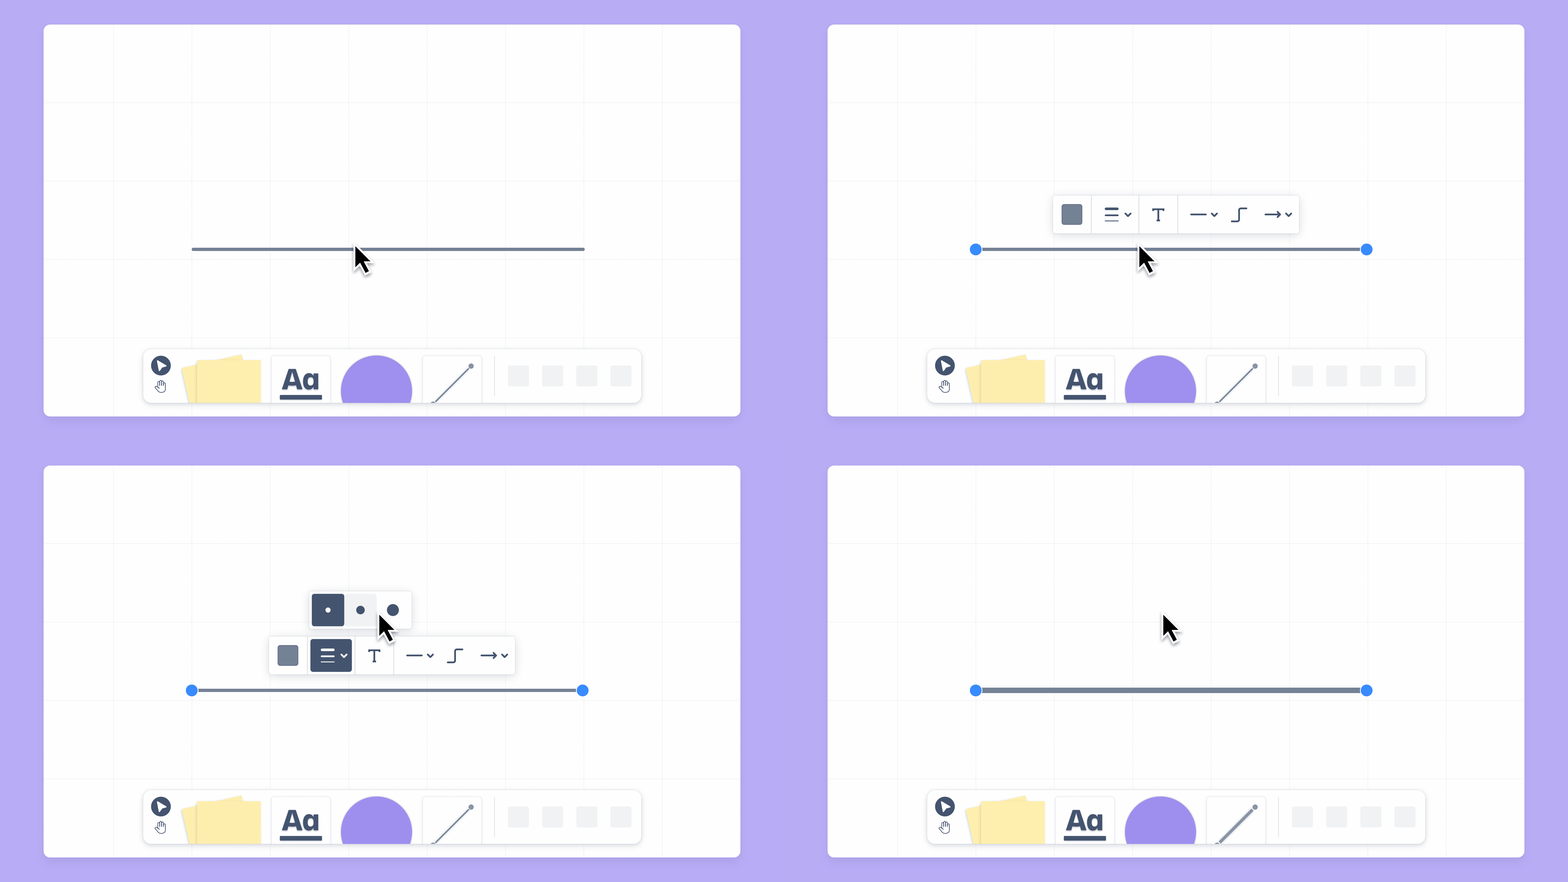
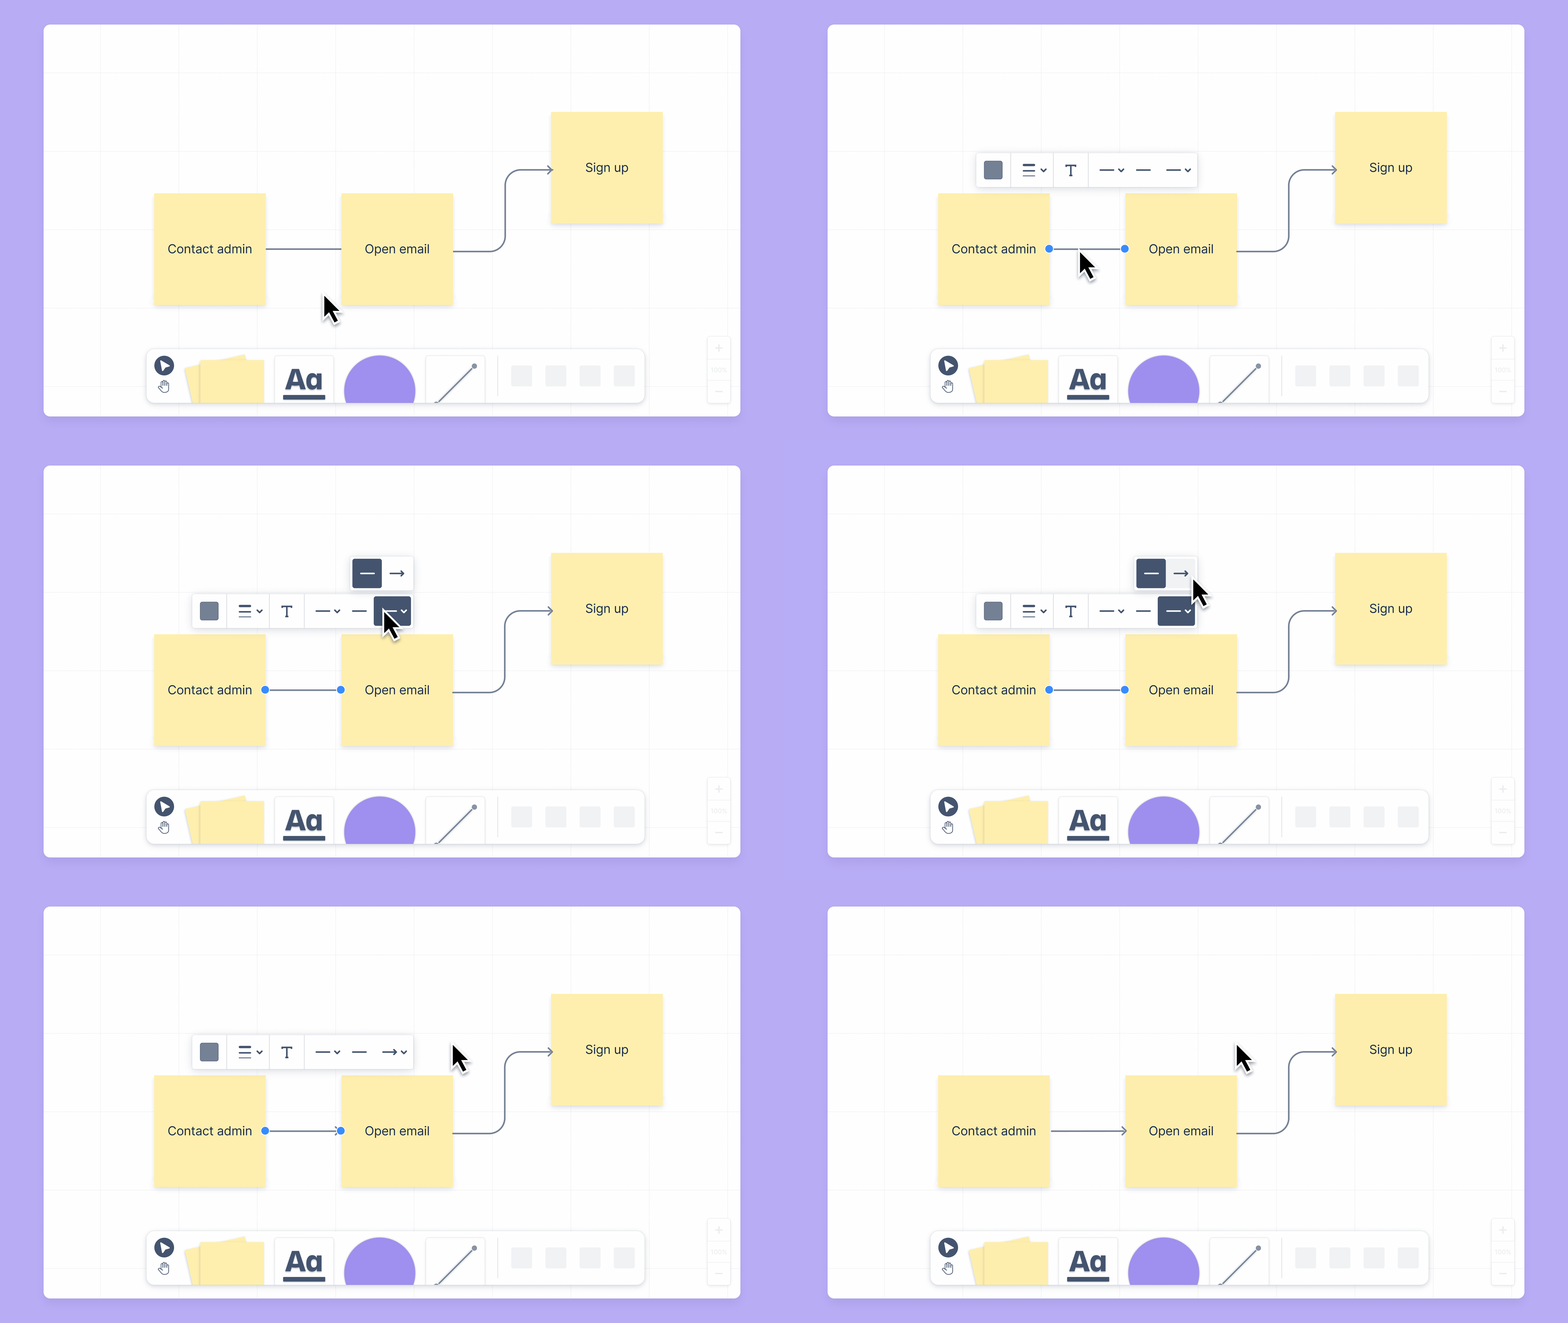
Edit line end styling
You can choose to either have nothing or an arrow on the endpoints of your line.
To change the end styling of a line:
Select the line.
Select from the two menus to the left or the right of the line type icon in the floating toolbar. Each will change the styling of one of the ends.
Select either the arrow or no end style icon from the menu.
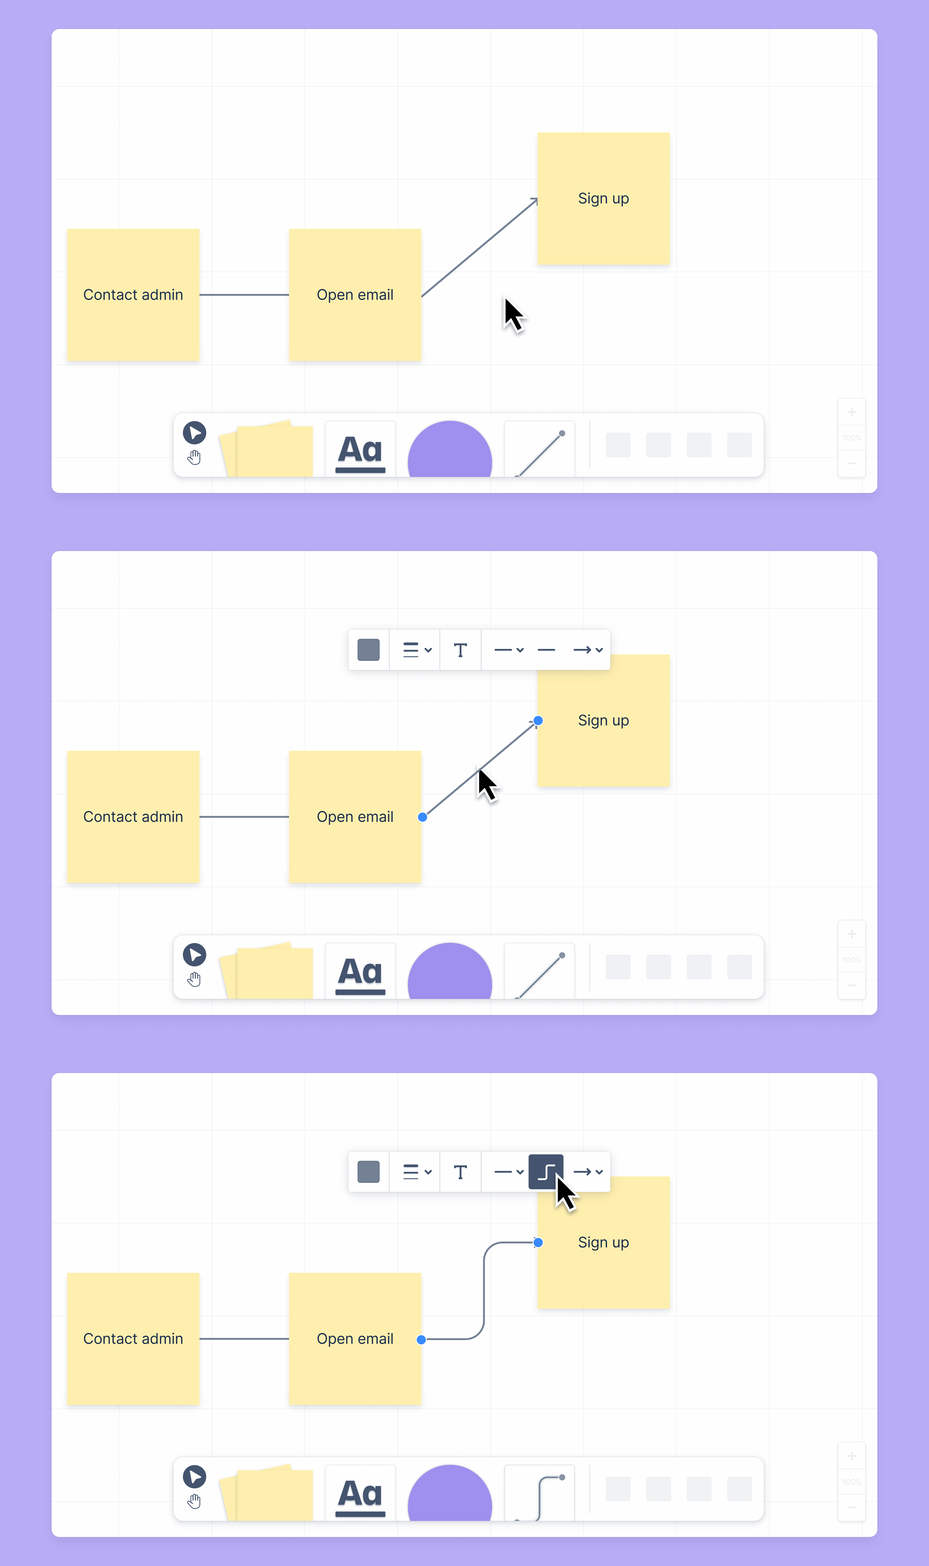
Edit line type
You can change your line from a straight to a dynamic line or vice versa.
To change the line type:
Select the line.
Select the line type icon in the floating toolbar. When selected, the line type will be a dynamic line. When not specified, the line type will be a straight line.
Add a line label
You can use labels to add descriptions to lines.
To add a line label:
Select the line.
Select the line label icon in the floating toolbar.
Enter the text for the line label.
Was this helpful?